Magnetic Generator for Beginners: Step-by-Step Build Guide (2026)
Published: December 7, 2025 | Updated: May 22, 2026
Building your first magnetic generator is one of the most rewarding DIY projects you can tackle. In this comprehensive step-by-step guide, we walk you through everything from materials to testing, no prior experience required.
Step 1: Understand the Basics
A magnetic generator converts mechanical energy into electrical energy using permanent magnets and copper wire coils. The core principle is electromagnetic induction, when a magnetic field changes near a conductor (wire), it forces electrons to move, creating electric current.
This is the same principle that powers every electrical generator in the world, from massive power plants to your bicycle dynamo. The difference with a DIY magnetic generator is the use of permanent neodymium magnets instead of electromagnets, which eliminates the need for an external power source to create the magnetic field.
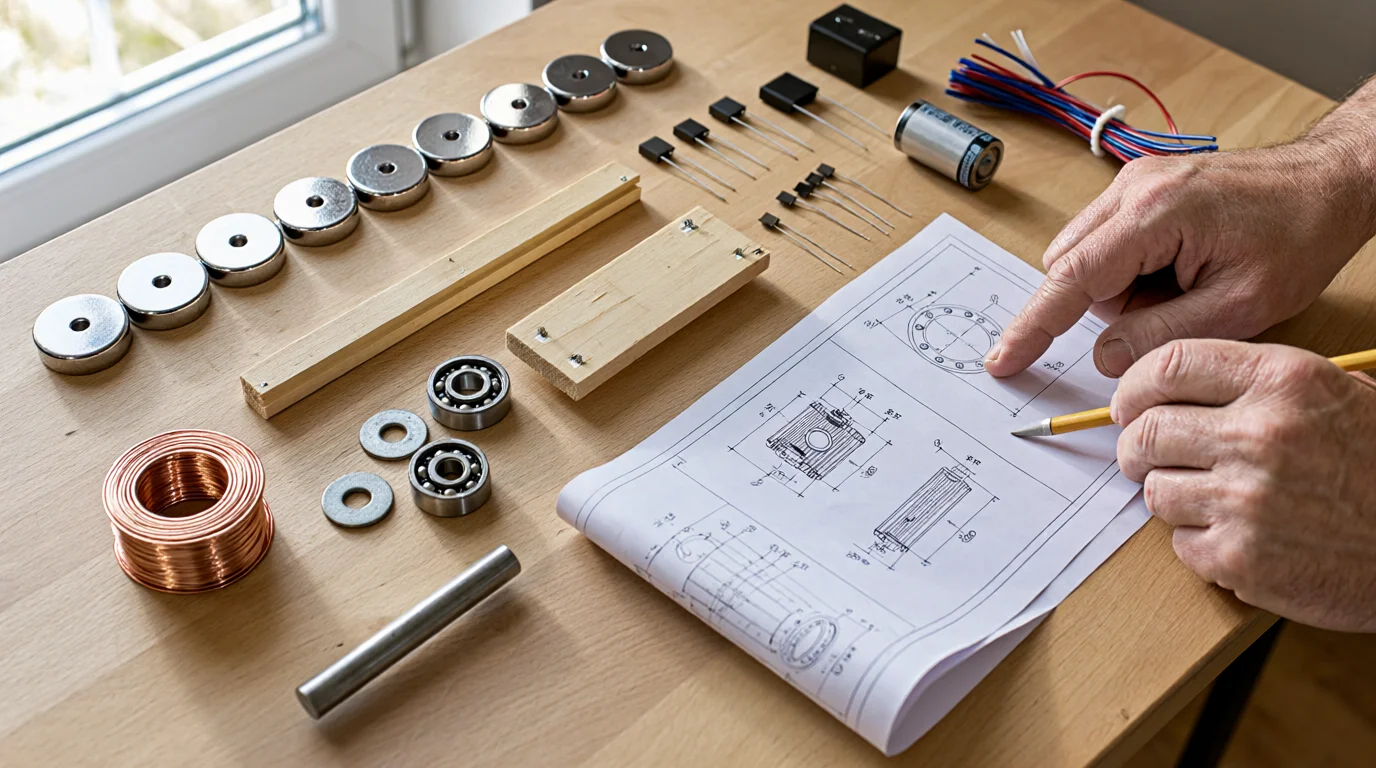
Step 2: Gather Your Materials
Basic Materials List
| Item | Quantity | Estimated Cost | Where to Buy |
|---|---|---|---|
| Neodymium disc magnets (N52 grade, 1" diameter) | 8-16 | $20-$40 | Amazon, eBay, Alibaba |
| Magnet wire (20-24 AWG, enameled copper) | 200-500 ft | $10-$25 | Amazon, McMaster-Carr, eBay |
| Steel disc/plate (2-4") | 2-4 | $5-$15 | Hardware store, Amazon |
| Ball bearings (same shaft size) | 2 | $3-$8 | Amazon, McMaster-Carr |
| Steel shaft or rod (1/4" or 3/8") | 12-18" | $3-$8 | Hardware store |
| Wooden frame or acrylic sheet | 1 piece | $5-$10 | Hardware store |
| Diodes (1N4007) | 4 | $1-$3 | Amazon, RadioShack |
| Capacitor (1000µF, 25V) | 1 | $2-$5 | Amazon, eBay |
| Wires and connectors | Assorted | $5-$10 | Hardware store |
| Total | $54-$118 |
Tools You'll Need
- Wire stripper/cutter
- Soldering iron and solder
- Drill with bits
- Screwdrivers
- Pliers
- Multimeter
- Hot glue or epoxy
Step 3: Build the Stator (Stationary Coils)
- Wind your coils: Wrap the magnet wire around a form (a cardboard tube or wooden block) 200-500 times. Keep the winding tight and even.
- Remove the form: Once wound, carefully slide the coil off the form.
- Secure the windings: Use hot glue or epoxy to hold the coil shape.
- Strip the wire ends: Remove 1/2" of enamel from each end using a wire stripper or by gently sanding.
- Solder leads: Attach short wires to each coil end for connection.
Tip: For better output, wind multiple coils and connect them in series. Each coil adds voltage.
Step 4: Build the Rotor (Spinning Magnets)
- Prepare the steel disc: This is the magnetic core. Clean and flatten both surfaces.
- Arrange the magnets: Place neodymium magnets on one side of the disc in a circular pattern. Alternate north and south poles.
- Glue the magnets: Use strong epoxy to secure each magnet. Double-check polarity orientation.
- Mount the shaft: Attach the steel shaft to the center of the disc using epoxy or a set screw.
- Balance the rotor: Spin the disc by hand, it should rotate smoothly without wobble.
Step 5: Assemble the Frame
- Cut the frame pieces: Cut wood or acrylic to create a housing that holds the stator coils and allows the rotor to spin freely.
- Mount the bearings: Install ball bearings in the frame at each end of the shaft path.
- Position the stator: Mount the coil assembly so the rotor magnets pass within 1-2mm of the coil faces.
- Test clearance: Spin the shaft by hand, the rotor should not touch the stator coils.
Step 6: Wire the Electrical Output
- Connect coils in series: Link the end of one coil to the start of the next. This adds voltage.
- Add a rectifier: Connect 4 diodes in a bridge configuration to convert AC to DC.
- Add a capacitor: Connect across the DC output to smooth the voltage.
- Add output terminals: Attach wires to the capacitor ends for your load (battery, LED, etc.).
Step 7: Test Your Generator
- Spin the rotor: Turn the shaft by hand or attach a fan blade for wind drive.
- Measure output: Use a multimeter to measure voltage across the output terminals.
- Expected output: A basic build should produce 1-5V DC at 50-200W depending on speed.
- Test with a load: Connect an LED or small battery and observe the output.
Troubleshooting Common Issues
| Problem | Likely Cause | Solution |
|---|---|---|
| No voltage | Coil not connected | Check all wire connections |
| Low voltage | Weak magnets or slow spin | Use stronger magnets or spin faster |
| Fluctuating output | Poor rectifier connection | Check diode connections |
| Coils overheat | Short circuit between windings | Check for enamel damage |
| Rotor binding | Misaligned bearings | Realign or replace bearings |
Next Steps After Your First Build
Once your basic generator works, you can:
- Add more coils to increase voltage
- Use larger magnets for stronger fields
- Build a wind turbine or water wheel as a prime mover
- Add battery storage to save generated power
- Connect an inverter for AC household power
Bottom Line
Building your first magnetic generator is accessible to anyone with basic tools and patience. A $50-$120 investment in materials can produce a functional generator that delivers real, measurable power. The skills you learn, winding coils, wiring circuits, balancing rotors, form the foundation for more advanced builds.
Tools You'll Need
Tools You'll Need
Before you start building, gather these essential tools. You don't need a professional workshop, most of these are common household items:
Essential Tools
- Drill (cordless is fine), for drilling mounting holes
- Saw (hand saw or jigsaw), for cutting wood/acrylic frame pieces
- Soldering iron, for connecting electrical components
- Multimeter, for testing voltage and current output (essential!)
- Wire strippers, for stripping magnet wire insulation
- Needle-nose pliers, for bending wire and positioning small parts
- Tape measure, for precise measurements
- Marker, for marking drill points
Helpful but Not Essential
- Dremel or rotary tool, for precise cutting and grinding
- Vise or clamp, to hold pieces while working
- Soldering stand, keeps your work area safe
- Magnifying glass, for inspecting small connections
- Heat gun, for applying heat shrink tubing
Where to Find Cheap Tools
- Hardware stores (Harbor Freight, local stores), basic tools at low prices
- Ebay, used tools at fraction of retail
- Thrift stores, often have drills, saws, and vises for $5-15
- Facebook Marketplace, people sell tool sets cheaply when moving
You can build your first generator with under $50 in tools if you shop smart.
Testing Your Generator
Testing Your Generator
Once assembled, you need to verify your generator is producing power. Here's a step-by-step testing process:
Step 1: No-Load Voltage Test
Spin the generator by hand (or with your motor) and measure the voltage across the output terminals with your multimeter. A basic build should show 1-5V DC at moderate spinning speed. If you get zero volts, check:
- Magnet polarity (all should face the same direction toward the coils)
- Wire connections (no broken solder joints)
- Coil continuity (multimeter on resistance mode, should show some resistance, not infinity)
Step 2: Load Test
Connect a small load (an LED light bulb or small motor) and observe. The LED should glow when spinning. If it doesn't:
- Increase spin speed
- Check that the LED is connected correctly (polarity matters for LEDs)
- Try a lower-resistance load
Step 3: Battery Charging Test
Connect your generator (through a rectifier diode) to a 12V battery. After 10-15 minutes of spinning, check the battery voltage with your multimeter. It should have increased by 0.1-0.5V depending on the battery's state of charge.
Step 4: Record Your Results
Note your voltage, current, and spin speed. This baseline helps you compare upgrades later. Write down:
- RPM (revolutions per minute)
- Voltage under load
- Current under load
- Calculated output (Voltage × Current = Watts)
Troubleshooting Guide
Troubleshooting Guide
Even with careful construction, things can go wrong. Here's how to diagnose and fix common problems:
Generator Produces No Voltage
Symptoms: Multimeter reads 0V when spinning
Possible causes and fixes:
- Wrong magnet polarity: All magnets must face the same direction. Use a compass to check, all poles should point the same way.
- Broken wire connection: Check every solder joint. Re-solder any cracked connections.
- Short circuit in coils: Use multimeter on resistance mode. If you read near-zero ohms across a coil, it's shorted. Rewind the coil.
- Reversed coil winding: If you wound two coils, they must be wound in the SAME direction. Reverse one coil if output is zero.
Low Voltage Output
Symptoms: Voltage is lower than expected (e.g., 0.5V instead of 3V)
Possible causes and fixes:
- Too many turns of wire: Fewer turns = lower resistance but also lower voltage. Try reducing turns by 10-20%.
- Air gap too large: Reduce the gap between magnets and coils to 1-2mm.
- Weak magnets: Test with a gauss meter. N52 neodymium should read 3,000-4,000 Gauss at the surface.
- Slow spin speed: Voltage is proportional to RPM. Spin faster or use a gear reduction.
Generator Overheats
Symptoms: Coils get hot to the touch after 10-15 minutes
Possible causes and fixes:
- Too much current draw: Disconnect the load and see if it still heats. If not, your load is too heavy.
- Shorted turns in coil: Use a multimeter to check coil resistance. If it's much lower than expected, you have shorted turns.
- Poor ventilation: Add ventilation holes to the frame or mount the generator where air can flow.
Noisy Operation
Symptoms: Grinding, clicking, or humming noise
Possible causes and fixes:
- Worn bearings: Replace with sealed ball bearings.
- Loose magnets: Apply epoxy to secure magnets to the rotor.
- Magnet rubbing on coils: Adjust the air gap.
- Unbalanced rotor: Add a counterweight or trim the rotor evenly.
Quick Reference Table
| Problem | Most Likely Cause | Fix |
|---|---|---|
| No voltage | Wrong magnet polarity | Check all magnet orientations |
| Low voltage | Air gap too large | Reduce gap to 1-2mm |
| Overheating | Heavy load | Reduce load or improve ventilation |
| Noise | Worn bearings | Replace with sealed bearings |
| Flickering output | Loose wire | Re-solder all connections |
Upgrading Your First Build
Upgrading Your First Build
Once your first generator works, here's how to improve it:
Upgrade 1: Better Magnets ($20-40)
Replace any ceramic or weak magnets with N52 neodymium. This alone can increase output by 30-50%.
Upgrade 2: More Coil Turns (+10-20%)
Add 10-20% more wire turns to your coils. This increases voltage but also resistance. Test both before and after.
Upgrade 3: Better Bearings ($5-15)
Replace any basic bearings with sealed ball bearings. This reduces friction and increases efficiency by 5-10%.
Upgrade 4: Rectifier Circuit ($2-5)
Add a bridge rectifier (4 diodes in a bridge configuration) to convert AC to DC. This allows you to charge batteries directly.
Upgrade 5: Voltage Regulator ($5-10)
Add a simple voltage regulator circuit to protect your battery from overcharging. This extends battery life significantly.
Upgrade 6: Larger Frame (+50-100% output)
Build a larger version with more magnets and larger coils. Use your first build as a template, everything you learned applies.
Total upgrade cost: $32-84 for upgrades 1-5. Upgrade 6 is a complete rebuild but uses the same principles.
Pro tip: Document every change you make. Note the before and after voltage, current, and RPM. This data helps you understand what works.
Related guides: Best magnetic generator plans for 2026 | Tesla magnetic generator materials list cost